The 25 largest files with Powershell

All we have encountered more than once out of space in our hard disks, usually at the most inopportune moment, and we had to dedicate ourselves to delete something to continue working.

Here I present a small script in Powershell which one we will find your largest files on your disk. Accepts two parameters:

  • The path where we want to check the size of the files. It can be an entire drive such as c:\ or, which is often more effective, a specific path such as the path where we keep our documents. The script searches recursively in the specified folder and its subfolders.
  • The second parameter is the number of files to display, starting with the largest. Normally between 25 or 50 largest usually left over something.

To use the script copies the following code (without the line numbers):

$Ruta = Read-Host 'Please, enter the route'
$NumFicheros = Read-Host 'Number of files to return'

Get-ChildItem -Path $Ruta -WarningAction SilentlyContinue -ErrorAction SilentlyContinue -Recurse -Force -File | `
 Select-Object @{Name='Ruta';Expression={($_.FullName)}},@{Name='Tamaño';Expression={($_.Length/1MB)}} | `
 Sort-Object -Property Tamaño -Descending | `
 Select-Object -First $NumFicheros | Format-table Ruta, {$_.Tamaño.ToString("000000.00")} -HideTableHeaders 
pause

Inside an empty text file and name it 25Ficheros.ps1

The important thing is to have the extension ps1. We have to have Powershell installed on our system. If we have Windows 10 installed, we have it already. If not, install it from following this link.

To execute it, you must click with the right mouse button on the file created with the script and select the option Run with Powershell.

20160420_25Ficheros_Paso01

If this is the first time you execute a Powershell script, it will tell you if you want to change the execution policy, as by default the scripts executions are not allowed. You will indicate yes, and you are requested for the two execution parameters.

20160420_25Ficheros_Paso02

Write both data and press ENTER after each item. The script will begin its work and after a moment (the more generic route to search in, the longer it takes) you will obtain the results in two columns. To the left, the file name with full path, and on the right the megas occupying the file.

20160420_25Ficheros_Paso03

For example, for my directory C:\Windows\System32 (and all subfolders), these are my top 25 files:

20160420_25Ficheros_Paso04

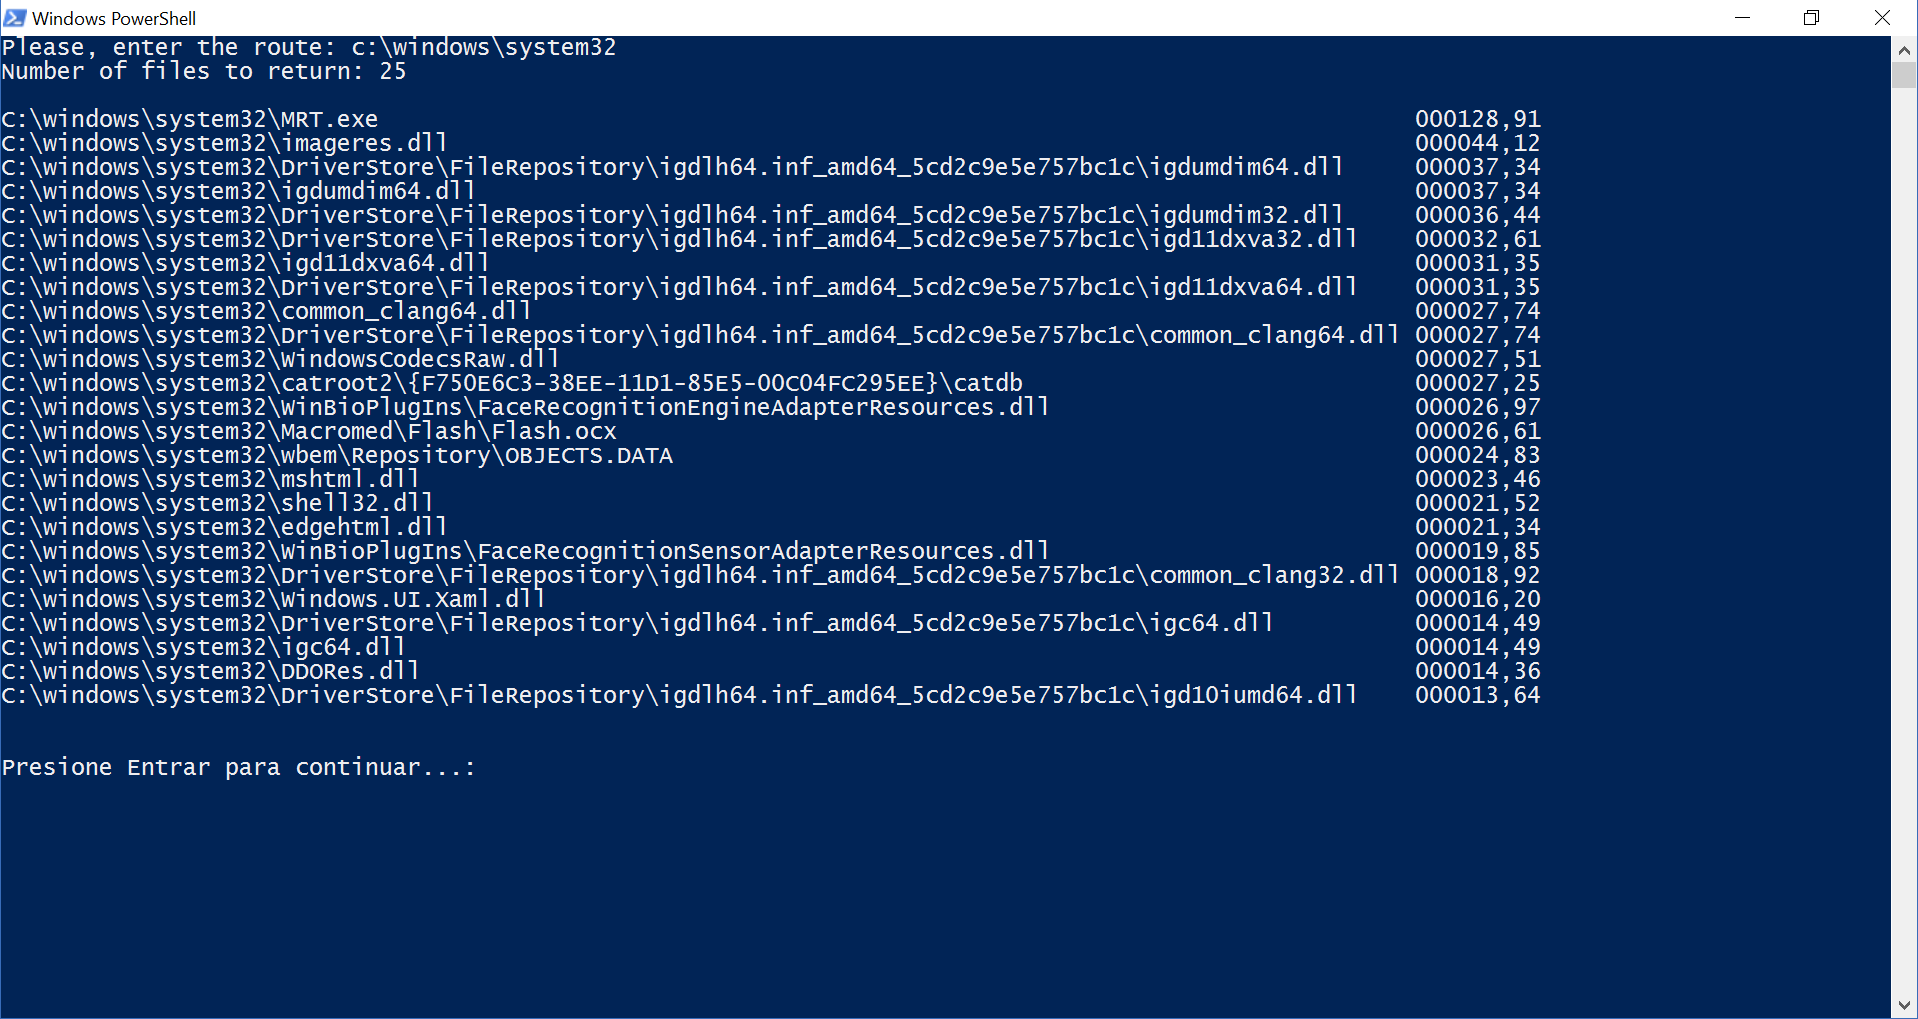
Press Enter again to close the window.

I hope you find it useful the script. For any comments do not hesitate to contact via links on social networks or email.


Assign OneDrive for business folder to a removable drive

OneDrive, the Microsoft storage unit in the cloud currently offers in its enterprise edition 1Tb of storage. It is a high quantity for a regular use. However, unlike his personal version, it is not allowed to change the local folder to a removable drive. By default, the business version is in the user path or if you modify it, in a path in a non-removable drive. In the personal version, during the installation process, you can either select a folder within or without a removable drive for the local files.

In the words of Microsoft, the two OneDrive are different products really, who share the name, hence the different behavior.

It might not seem like a problem at first, but with a terabyte of possible storage, devices such as Windows tablets, with 32Gb or 64Gb storage units, take 10 or 20 gigas, that could be in a memory card, can mean the difference between being able or not to use the system.

In such cases, have an SD card always inserted in the tablet is essential as a support unit. And it is ideal for local OneDrive storage unit.

The following solution allows this operation, but we must clarify that although functional, is not an official Microsoft solution, with all that involve. I’m not responsible for any problems that may arise, either.

The first step is to create a folder in a non-removable drive of our system. For example, at the root of C, called SD:


20160406_OnedriveSD_Paso01


The folder must be empty to continue, so we should not copy anything inside. Now we open the Disk Manager and look for the removable drive. Press the right button on it and select the option to change the drive letter:

20160406_OnedriveSD_Paso02

Click on the option to add route:

20160406_OnedriveSD_Paso03


And select the folder created at first and then press accept:

20160406_OnedriveSD_Paso04


Now the folder is a mount point of the removable unit. We just have to unlink OneDrive, if we have it linked, and relink, changing during the initialization process the local path, using the folder (not the removable drive). We observe that it does not put any constraint on the use of that folder and it begin normally synchronization. Files are sent to the removable drive, not taking space in non-removable drive.

If we want to remove the drive, we must unlink the OneDrive account first.